App registration in Microsoft Azure with OAuth
This is an instruction for app registration in Microsoft Azure with OAuth and OpenID. The purpose of the registration is authentication MA!N for sending e-mails on behalf of your organization.
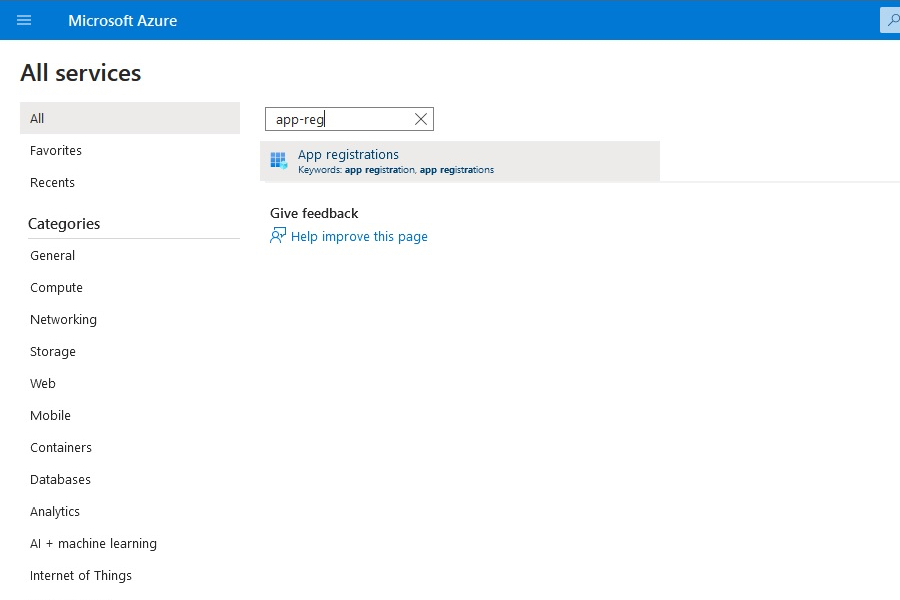
- Go to the Microsoft Azure Portal and sign in to a Tenant with the rights to set up an App registration. If in doubt, please check with your IT administrator. Each organization with a Microsoft account also has an Azure account.
- Search for App registrations and choose it from the results.
- On the App registrations page, select New registration.
- On the New app registration page, go to:
- Name: give it a description, e.g., the name of the app for which you register.
- Redirect URI: select Web and give it the value https://www.ce-it.com.
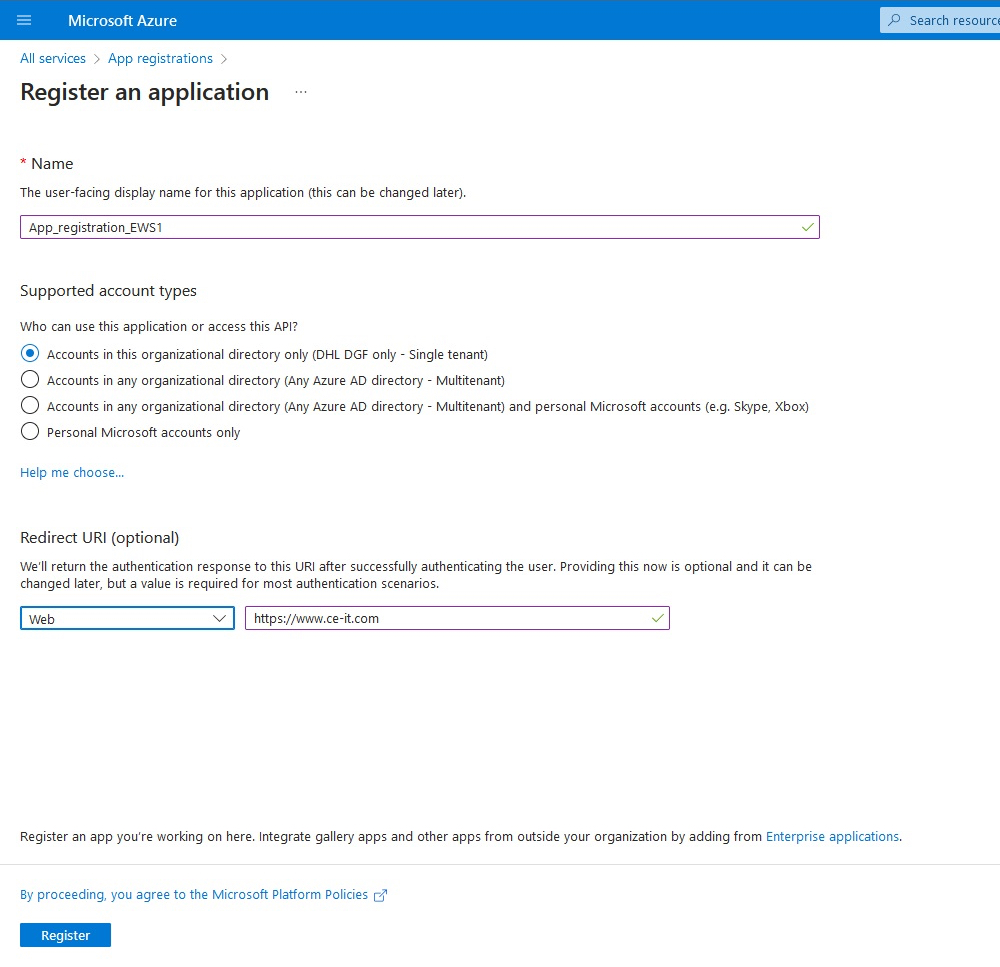
- Choose Register.
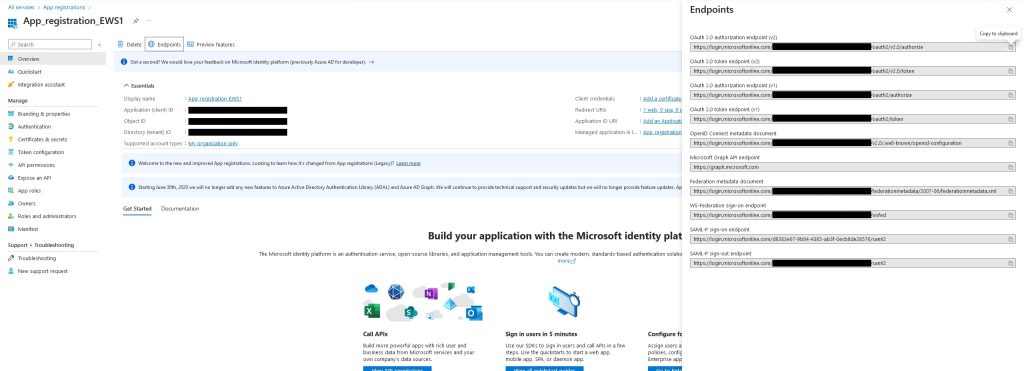
You are now redirected and on this page you need to collect the following items and send them to CE-iT:
- Overview (Essentials):
- Application (client) ID
- Object ID
- Directory (tenant) ID
- Select Endpoints (right above Essentials):
- Oauth 2.0 authorization endpoint (v2)
- Oauth 2.0 token endpoint (v2)
Close the Endpoints section and select Certificates and secrets from the sidebar on the left.
- Select Client secrets
- Select New client secret
- Give the secret a description and select an expiration period. For MA!N, we recommend 24 months.
- Select the button Add.
Sent the following items to CE-iT (both items are only shown once|):
- Value
- Secret ID
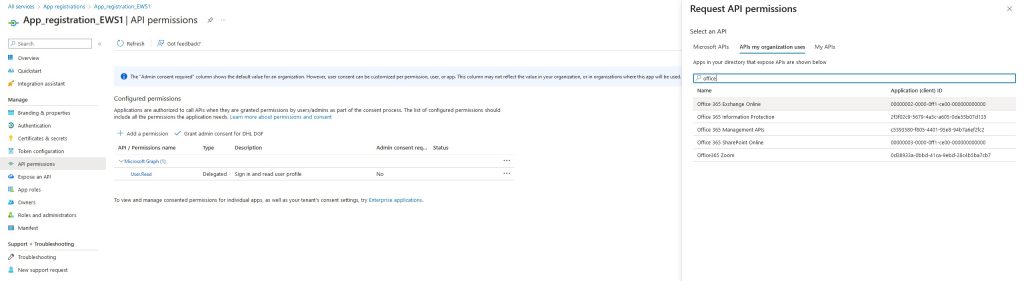
In the sidebar on the left, select API permissions:
- Select Add a permission.
- A new section opens. Go to APIs my organization uses and select Office 365 Exchange Online.
- Select Application permissions (on the right).
- Select the checkbox at full_access_as_app
- Select the button Add permission
The app-registration is now completed. Please send us the following information:
- Application (client) ID
- Object ID
- Directory (tenant) ID
- Oauth 2.0 authorization endpoint (v2)
- Oauth 2.0 token endpoint (v2)
With this information, CE-iT generates the consent-URL and can proceed with the further integration.
Note!
For finishing the integration and MA!N to be able to send e-mails on behalf of your organization, impersonation for the email address(es) is required.