Example: building a search window
We will build a search window. This starts with opening a command window. For a first introduction you might want to read Starting with dynamic forms.
Adding the form to the container app
We will add the form to the container app as a ‘fixed’ positioned window, at the top of the application. The type of window will be a drop-down window. To achieve this, first the following sequence of SQL command has to be executed on the SQL database.
INSERT INTO [Controls]([Control name], [Command ID Select]) VALUES('Form_Dynamic79', 79)
GO

INSERT INTO [Security controls]([Security control ID], [Description], [Active])
VALUES ('Form_Dynamic79', 'Form Search', 1)
GO

INSERT INTO [Security role controls]([Security control ID], [Security role ID], [Active])
	SELECT 'Form_Dynamic79'
		  ,[Security role ID]
		  ,1
	  FROM [Security roles]
GO
- Add the control as a control to the [Controls]() table.
- Add the control name to the [Security controls]() table.
- Assign the different roles in the application to the new form, so that the user with that role can see the new window. This is defined in the [Security role controls]() table.
To see the form you will have to restart MA!N. After restarting MA!N the new search window is added to the view menu. You can open it by selecting it in the view menu (View => Search).
When opened, you can drag the window anywhere within the container application. For this example we will position it at the top and make it a drop-down window. The result is shown below.
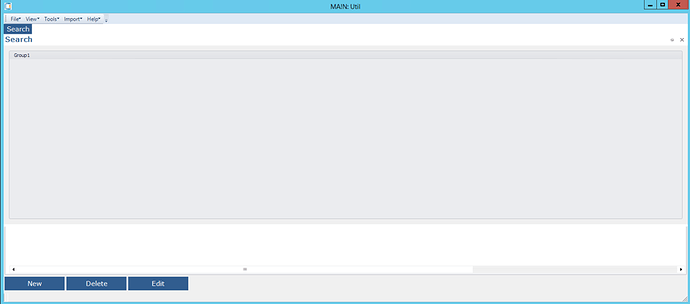
The defined group (group 1) is already visible, but the data isn’t, since the controls aren’t added to the form yet. That is the next step.
Adding controls to the form
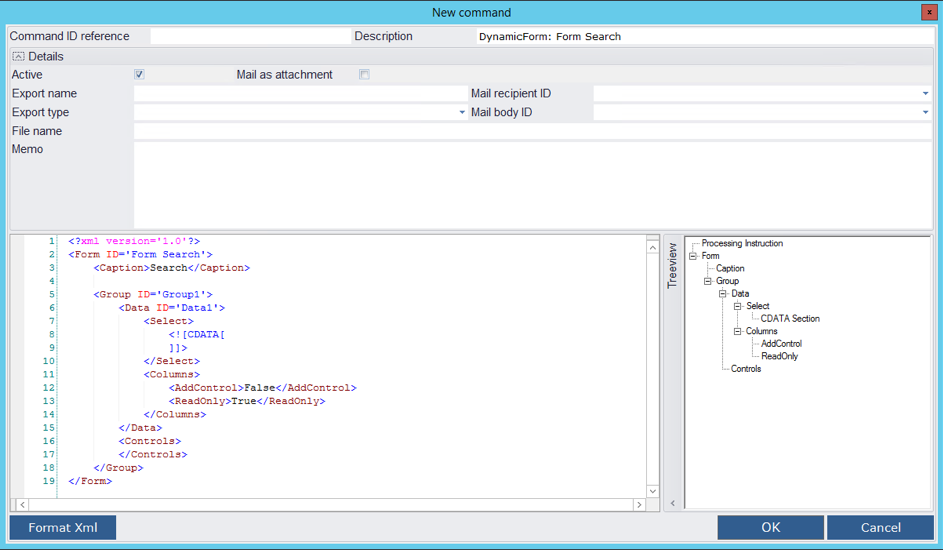
For displaying controls, we need to add them to the XML of the command. To do this select the search form in the commands window and select Edit.
Now edit the XML code and change it to:
<?xml version='1.0'?>
<Form ID='Form Search'>
	<Caption>Search</Caption>

	<Group ID='Group search'>
		<Data ID='Data search'>
			<Select>
				<![CDATA[
					SELECT	[Customer ID]
					FROM	[Customers]
				]]>
			</Select>
			<Columns>
				<AddControl>False</AddControl>
				<ReadOnly>True</ReadOnly>
			</Columns>
		</Data>
		<Controls>
			<Control ID='Grid search'>
				<Type>DataGrid</Type>
				<DataID>Data search</DataID>
				<ReadOnly>True</ReadOnly>
			</Control>
			<Control ID='Button search'>
				<Type>Button</Type>
				<Caption>Search</Caption>
				<Click>
					<DataID>Data search</DataID>
				</Click>
			</Control>
		</Controls>
	</Group>
</Form>
The result after restarting MA!N will be:
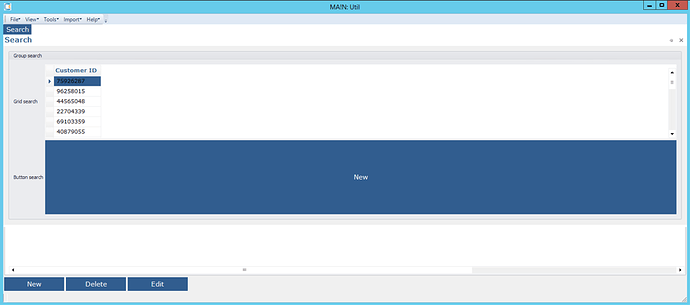
As you can see, the newly added controls (Datagrid and button search) are visible.
Adding the search field(s)
To be able to search customer ID and name, we need to add the fields to the query and the window.
First extend the select query with extra data.
|SELECT|[ID]|
|---|---|
||, [Administration ID]|
||, [Customer ID]|
||, [Name]|
|FROM|[dbo].[Customers]|
Then add these fields to the window, so the search data can be entered. This is achieved by setting the value ‘False’ to ‘True’.
<AddControl>True</AddControl>Changing the layout
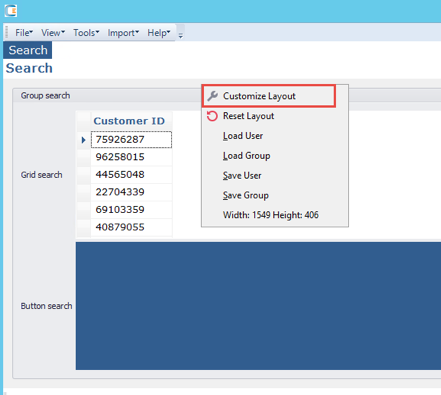
The next step is changing the layout of the form, to reposition the controls and make the window more representable. To do this right click on the window and select ‘Customize Layout’ in the popup window that appears.
It’s important not to forget to save your changes before closing the application. In the same popup menu, select ‘Save Group’.
You can drag items to the window. When selecting an item in the Customization panel, you can change settings for the selected item.
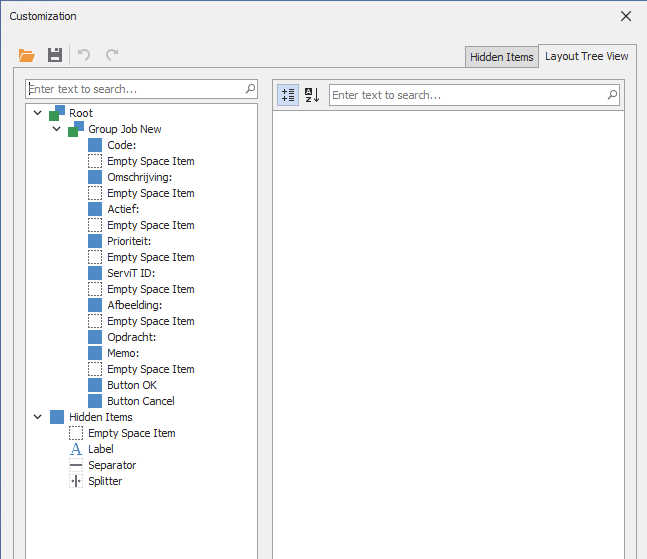
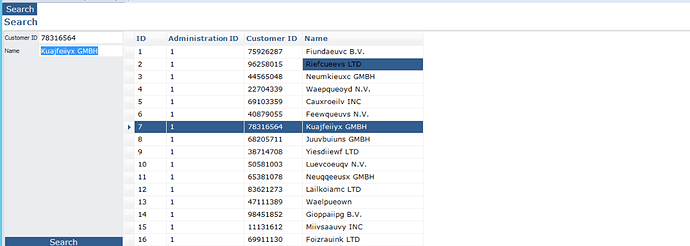
After changing the layout and saving it, the search window has following layout:
Additional information: Adjusting the window settings and layout.
Adding search code
The final step is adding functionality. At this stage, when the button is pressed nothing happens yet. We need to add new group with a data grid that contains the search results.
This is the on clickfunctionality of the search button:
<Control ID='Button search'>
	<Type>Button</Type>
	<Caption>Search</Caption>
	<Click>
		<DataID>Data search</DataID>
		<Active>
			<Refresh>
				<DataID>Data search result</DataID>
			</Refresh>
		</Active>
	</Click>
</Control>
The new group:
<Group ID='Group search results'>
	<Caption>Resultaat</Caption>

	<Data ID='Data search result'>
		<DataID>Data search</DataID>
		<Select>
			<![CDATA[
				SELECT	DISTINCT
							[Customers].[Administration ID]
						,	[Customers].[Customer ID]
						,	[Customers].[Name]
				FROM	[Customers]
				WHERE	(	@Customer_ID IS NOT NULL
							OR
							@Name IS NOT NULL
						)
						AND	(	@Customer_ID IS NULL
							OR	[Customers].[Customer ID] LIKE '%' + @Customer_ID + '%'
							)
						AND	(	@Name IS NULL
							OR	[Customers].[Name] LIKE '%' + @Name + '%'
							)
			]]>
		</Select>

		<Columns>
			<AddControl>False</AddControl>
			<ReadOnly>False</ReadOnly>
		</Columns>
	</Data>

	<Controls>
		<Control ID='Grid search result'>
			<Type>DataGrid</Type>
			<DataID>Data search result</DataID>
			<Caption>Search Result</Caption>
		</Control>
	</Controls>
</Group>
After changing the layout the result looks like this:
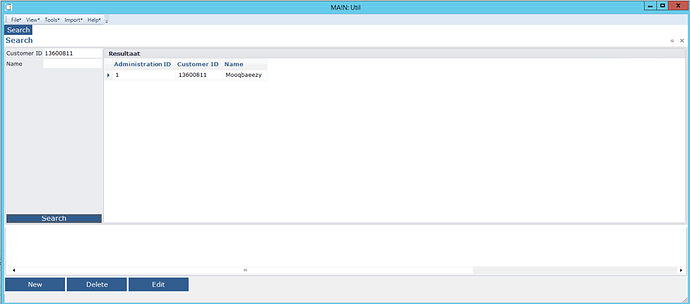
That’s it. Building other windows, follows the same approach.